
NEWS
Out With The Old, In With The New
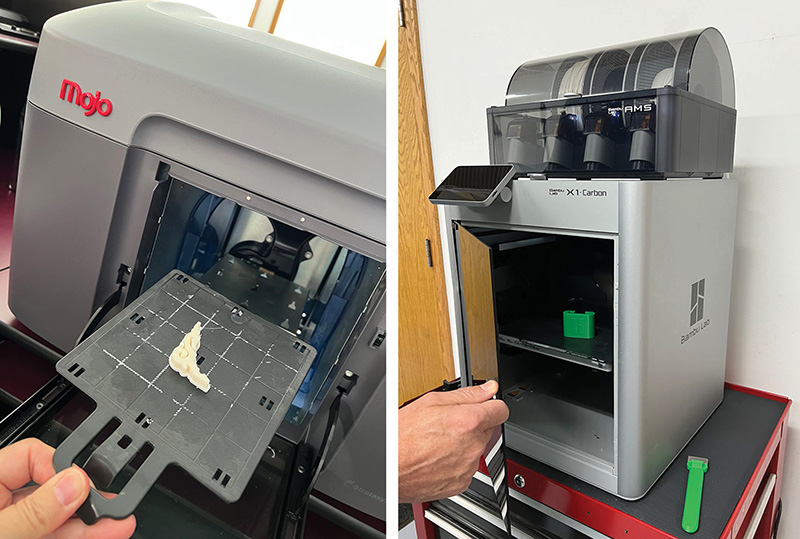
After nine years of service at Design Interface, our pair of trusty Mojo printers are finished. Kudos to Stratasys for creating an easy to use, reliable machine, unfortunately, have discontinued support. Enter the new Bambu printer – it’s fast, can print a variety of materials, and makes bigger prints (build volume: 10x10x10 inches).
Oh, and we can’t leave out the FormLabs printer, which prints resin prints in many materials, including clear! (See our last post about colorizing resin prints).
The printer service is open for business, and the prices range from $20-$40 depending on the size and complexity of the part. Contact us at 440-871-0600 or info@designinterface.
Design Interface Inc. can show you what is possible. Our forward-thinking solutions for product design, package design, medical device design, graphic design, and photography unlock the value of your ideas as we communicate your message and goals. See more here: https://designinterface.com/
How to Add Color to Clear 3D Resin Prints
Interested in dying a resin print?
Well, we’ve been working on prototypes involving soft flexible components for a client. Typically, these prints are clear and colorless. However, when one of our prints failed, we decided to experiment with dying a 3D print. After some research, we discovered that all we needed was some alcohol-based ink.
Since the resin is alcohol-based, the dye chemically bonds and doesn’t wear off like paint would. We were surprised at how easy and effective this technique turned out to be. Stay tuned as we share our experience with using alcohol-based ink to add color to clear resin prints, providing a simple yet effective solution for our prototypes.
Design Interface Inc. can show you what is possible. Our forward-thinking solutions for product design, package design, medical device design, graphic design and photography unlock the value of your ideas as we communicate your message and goals. See more here: https://designinterface.com/
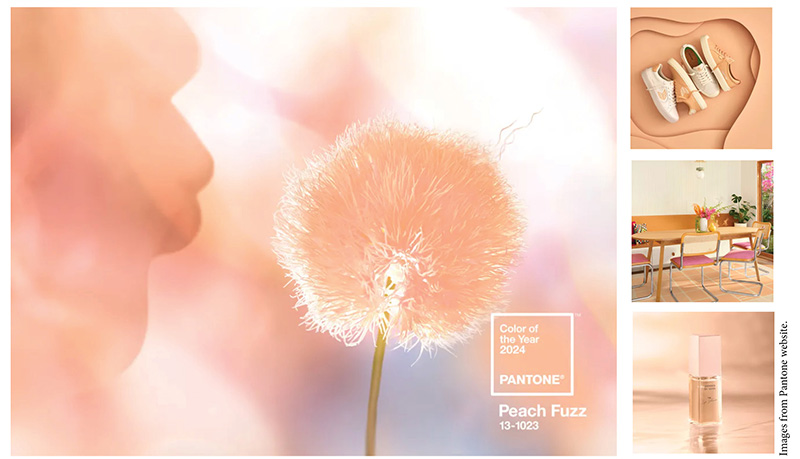
Pantone Color of the Year 2024: Peach Fuzz
With all of the color predictions rolling in at the end of the year, the most anticipated one is Pantone’s Color of the Year— For 2024 it is Pantone 13-1023, Peach Fuzz. “A cozy peach hue softly nestled between pink and orange, Peach Fuzz brings belonging, inspires recalibration, and an opportunity for nurturing, conjuring up an air of calm, offering us a space to be, feel, and heal and to flourish from whether spending time with others or taking the time to enjoy a moment by ourselves,” says Leatrice Eiseman, Executive Director, Pantone Color Institute.
The announcement of the heartfelt hue marks the 25th anniversary of Pantone’s Color of the Year initiative. “In the spirit of PANTONE 13-1023 Peach Fuzz, we reflect back on the last 25 years of the Pantone Color of the Year program grateful to provide an avenue where designers and color enthusiasts all over the world can engage in a conversation about color, be inspired by color and showcase their creativity within their communities. We look forward to continuing this for many more years to come.” added Laurie Pressman, Vice President of the Pantone Color Institute.
To read more about Peach Fuzz and how the color is chosen go to: https://media.hubspot.com/meet-the-woman-who-decides-the-color-of-the-year-1?ecid=ACsprvvKfZ8ZKNQ5FQrMtZCoz61WC6EYY-jVV_SZ1tGo9IN2Pfth46YLhpn4EI7r4kUdQcyzcy5_&_hsmi=282106975.
Design Interface Inc. can show you what is possible. Our forward-thinking solutions for product design, package design, medical device design, graphic design, and photography unlock the value of your ideas as we communicate your message and goals. See more here: https://designinterface.com/
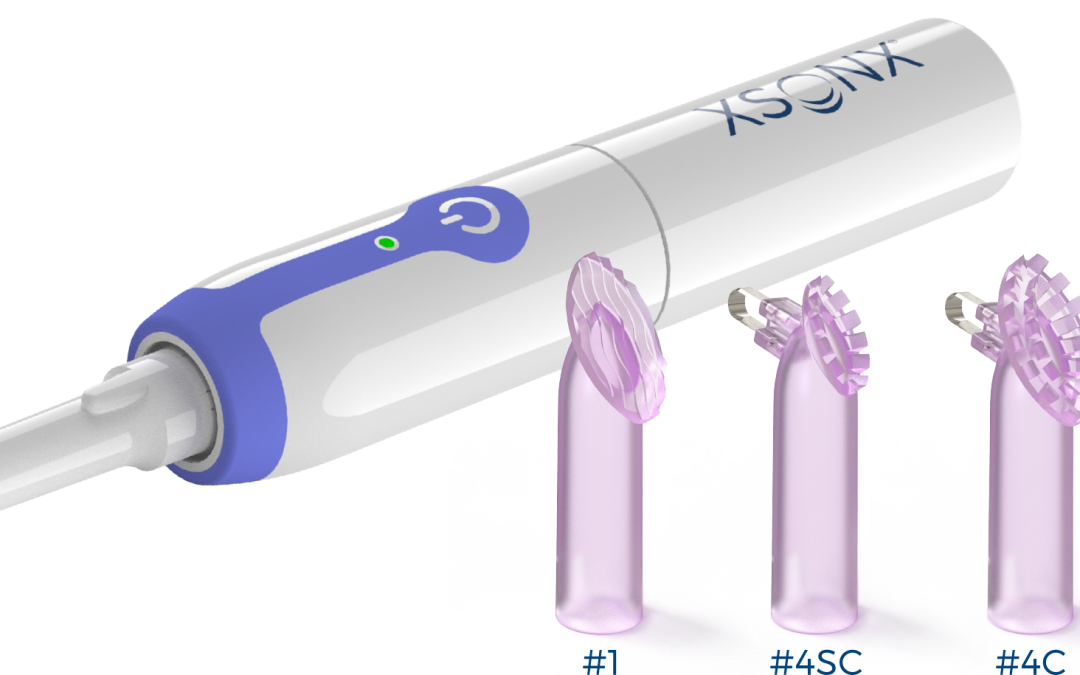
XSONX Revolutionizes Wound Care with New Device
At Design Interface Inc., innovation is not just a goal; it’s a commitment to transforming ideas into reality. We are thrilled to introduce our latest creation, the XSONX Wound Hygiene System – a revolutionary medical device designed to elevate the standard of wound care.
The Genesis of Innovation
The XSONX Wound Hygiene System is the result of collaborative efforts between our talented team at Design Interface Inc. and the visionary inventor behind this groundbreaking technology. From concept to creation, we dedicated extensive development time to perfecting every detail, ensuring a product that meets and exceeds expectations. Adrian Slattery, the head of the design team, expressed, “Having dedicated many years to its development, I’m gratified to see it delivers more comfortable care for the patient.”
Micro-Vibrational Technology: A Game-Changer in Wound Care
The core of XSONX lies in its cordless system, which is equipped with micro-vibrational technology. This cutting-edge feature allows for the powerful yet gentle cleaning and debridement of chronic and contaminated wounds. We understand the importance of precision in medical devices, so substantial testing, including trials with wound care professionals, was conducted to refine the system.
During the development phase, our team utilized orange peel for initial testing, a testament to our commitment to thorough and responsible testing procedures. Patient safety and comfort are paramount, and we left no stone unturned to ensure that the XSONX Wound Hygiene System delivers on its promises.
Features that Redefine Wound Care
The XSONX Wound Hygiene System boasts a range of features that set it apart:
• Slough and Biofilm Removal: The device effectively removes slough and biofilms, promoting a cleaner wound environment conducive to optimal healing.
• Low-Frequency Vibrations: Operating at frequencies below 2.5kHz, the system minimizes pain perception, offering a more comfortable experience for wound care patients.
• Simplified Healing: By simplifying wound hygiene, the XSONX system eliminates barriers to healing, providing a cost-effective and efficient alternative to current approaches.
Breaking Away from the Norm: XSONX vs. Current Approaches
Traditional wound care methods often involve sharp scalpel debridement associated with higher pain levels. The XSONX Wound Hygiene System challenges this norm, offering a pain-reducing solution that enhances the healing process.
The XSONX Wound Hygiene System offers versatility with three distinct wound heads: Scrubbing Head (#1): Ideal for thorough cleaning of wounds. Small Debriding Head (#4S): Designed for precision in debriding smaller areas. Debriding Head (#4): Offering a broader debriding capability for larger wound areas.
Visit the XSONX website at https://xsonx.com/ to find out more.
Unlock the potential of your ideas with Design Interface Inc. Our innovative solutions in product design, package design, medical device design, graphic design, and user experience (UX) go beyond aesthetics. We create meaningful solutions that make a difference, effectively communicating your message and goals. Explore the transformative impact of our forward-thinking designs at https://designinterface.com/.
Designing is like cooking—it is all about the right ingredients in the right amount to make it delicious.
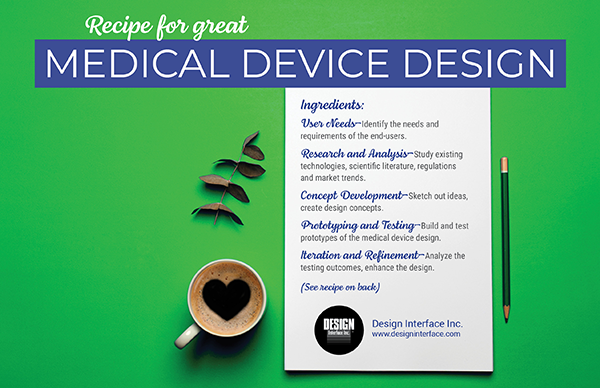
Step into the kitchen of innovation, where the art of culinary creation finds its parallel in the meticulous process of crafting exceptional medical devices. In this recipe for success, we distill the complex endeavor of medical device design into five essential steps, each playing a vital role in the final masterpiece. Just as a chef combines ingredients with precision, we combine research, creativity, and refinement to bring forth the recipe for achieving greatness in medical device design.
Step 1: User Needs
Just like any good recipe starts with understanding the taste preferences of the diners, a successful medical device design begins by identifying the needs and requirements of the end-users. Engage with healthcare professionals, patients, and other stakeholders to understand their challenges, expectations, and desired outcomes.
Step 2: Research and Analysis
Similar to gathering the necessary ingredients and understanding their properties before cooking, thorough research and analysis are crucial in medical device design. Study existing technologies, scientific literature, regulations, and market trends. Identify potential risks and limitations, while also considering ethical considerations.
Step 3: Concept Development
Just as a chef imagines a dish and plans the recipe, it’s time to brainstorm and develop concepts for your medical device. Sketch out ideas, create design concepts, and evaluate their feasibility, functionality, and potential impact. Consider factors such as usability, ergonomics, aesthetics, and manufacturability.
Step 4: Prototyping and Testing
Just as a cook prepares a sample dish to taste and refine, it’s essential to build prototypes of the medical device design. Utilize rapid prototyping techniques, 3D printing, or other suitable methods to create physical or virtual models. Test the prototypes rigorously, considering performance, safety, durability, and user feedback. Iterate and refine the design based on the test results.
Step 5: Iteration and Refinement
Like adjusting seasoning or making slight modifications to improve a dish, the final step involves iteration and refinement of the medical device design. Analyze the testing outcomes, and incorporate feedback from users, medical professionals, and regulatory requirements. Enhance the design, address any identified issues, and optimize the medical device’s functionality, reliability, and user experience.
As the final garnish is placed thoughtfully to elevate a dish, the meticulous execution of each step in this recipe enriches the world of medical device design. Just as a memorable meal lingers on the palate, let these principles leave a lasting imprint in your approach to innovation. With this recipe as your guide, may your future endeavors in medical device design be nothing short of a culinary masterpiece that revolutionizes healthcare and enhances well-being.
Design Interface Inc. can show you what is possible. Our forward-thinking solutions for product design, package design, medical device design, graphic design, and photography unlock the value of your ideas as we communicate your message and goals. See more here: https://designinterface.com/
Designing is like cooking—it is all about the right ingredients in the right amount to make it delicious.
Step into the world where design meets creativity in this cooking-inspired recipe for crafting exceptional package designs. Just as a culinary masterpiece requires a thoughtful process, designing an appealing package demands careful orchestration. In five flavorful steps, we’ll explore how to infuse your product’s essence into every visual element, resulting in an irresistible package that’s sure to leave a lasting impression.
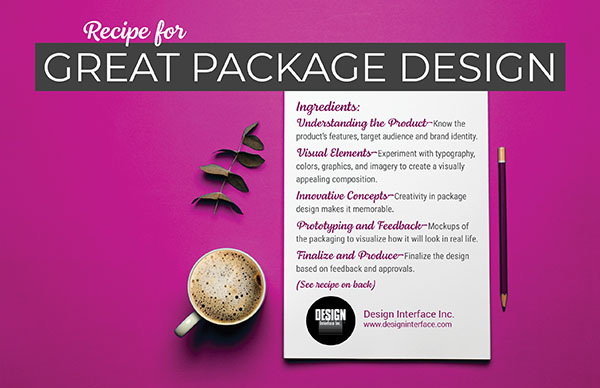
Prep-Time: Choose the Right Ingredients (Understand the Product)
Just like cooking, excellent package design starts with understanding the product. Know the product’s features, target audience, and brand identity. Identify the unique selling points and key messages you want to convey through the packaging. This understanding will guide the design process and ensure the package effectively represents the product.
Review Ingredients: Mix Flavors and Textures (Visual Elements)
In cooking, mixing flavors and textures creates a harmonious and balanced dish. In package design, combining visual elements achieves the same effect. Experiment with typography, colors, graphics, and imagery to create a visually appealing composition. Consider the overall aesthetic, hierarchy of information, and brand consistency while balancing various design elements.
Start Main Course: Season with Creativity (Innovative Concepts)
Just as seasoning adds flavor to a dish, injecting creativity into package design makes it memorable. Explore innovative concepts and design ideas that align with the product and brand. Think outside the box and consider unique shapes, materials, or interactive elements that can elevate the package’s appeal and create a lasting impression.
Sample While Creating: Bake and Test (Prototyping and Feedback)
Baking allows flavors to develop in cooking, and testing helps adjust the recipe. Similarly, in package design, create prototypes or mockups of the packaging to visualize how it will look. Seek feedback from peers, stakeholders, and potential customers. Evaluate the usability, visual impact, and product and brand identity alignment. Make necessary adjustments based on feedback.
Serve Finished Product: Serve with Confidence (Finalize and Produce)
In cooking, serving a dish requires confidence in its taste and presentation. In package design, finalize the design based on feedback and approvals. Ensure all necessary information, branding elements, and legal requirements are incorporated. Collaborate with manufacturers or printers to produce the final package, ensuring the design is faithfully translated from concept to reality.
By following this recipe-inspired approach, Design Interface can help you create a great package design that effectively communicates the product’s essence, engages the target audience, and leaves a positive and lasting impression. Bon appétit!
Design Interface Inc. can show you what is possible. Our forward-thinking solutions for product design, package design, medical device design, graphic design, and photography unlock the value of your ideas as we communicate your message and goals. See more here: https://designinterface.com/
Designing is like cooking—it is all about the right ingredients in the right amount to make it delicious.
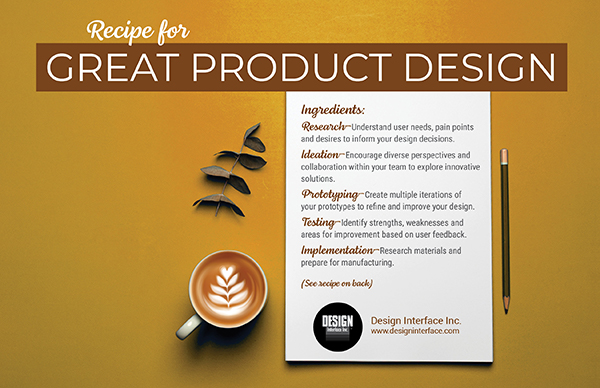
Just as a chef combines carefully selected ingredients to create a culinary masterpiece, a product designer orchestrates research, ideation, prototyping, testing, and iteration to craft a remarkable user experience. This recipe outlines the essence of a successful product design process in its key steps, offering a step-by-step guide to cooking up designs that meet user needs and leave a lasting impact. So, don your apron of creativity, and let’s embark on this design culinary journey to concoct greatness!
Prep-Time: Research
Preheat your design process by thoroughly researching your target audience, market trends, competitors, and ergonomics. Understand user needs, pain points, and desires to inform your design decisions.
Review Ingredients: Ideation
Mix your research findings with creative brainstorming sessions. Generate a range of ideas and concepts for your product design. Encourage diverse perspectives and collaboration within your team to explore innovative solutions.
Start Main Course: Prototyping
Take your best ideas and bake them into visual prototypes—sketches, wireframes, or digital designs.
Create multiple iterations of your prototypes to refine and improve your design.
Sample While Creating: Testing
Serve your prototypes to real users and observe their interaction.
Gather their feedback and let it marinate, using it to improve usability and functionality.
Serve Finished Product: Iteration
Apply user feedback to your design, finely tuning every aspect.
Repeat the testing and refinement until you achieve a design that satisfies the user’s palate.
Bon appétit! With these five steps, you’re ready to cook up product designs that are as delectable as they are functional. Remember, like in cooking, the secret ingredient is passion—infuse your design process with it and watch your creations leave users craving more.
Design Interface Inc. can show you what is possible. Our forward-thinking solutions for product design, package design, medical device design, graphic design, and photography unlock the value of your ideas as we communicate your message and goals. See more here: https://designinterface.com/
Designing is like cooking—it is all about the right ingredients in the right amount to make it delicious.
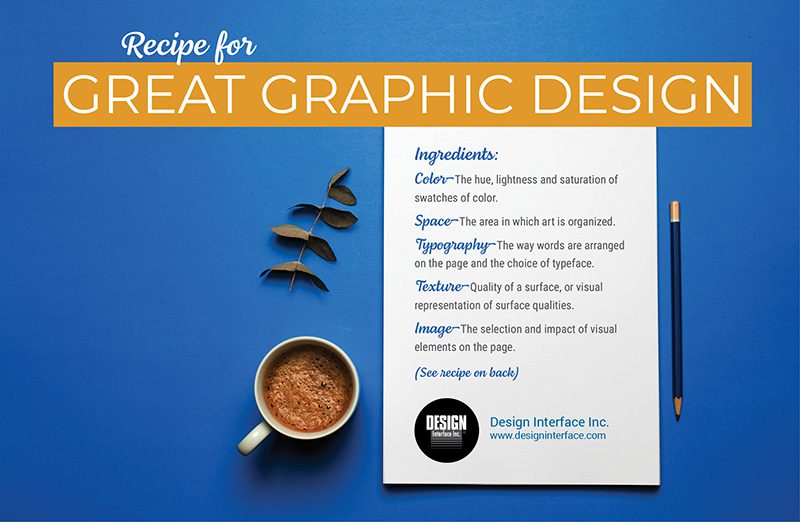
Graphic design isn’t just about putting things together randomly. It’s more like following a recipe, where each project has its own step-by-step process. Here is our 5-step creative recipe for great-looking graphic design.
Prep-Time: Kickoff meeting to define the scope of the project
–We start by meeting to determine what the project should include. It’s best to meet one-on-one to make sure we understand each other. We ask many questions and listen carefully to set goals, targets, and a schedule we all agree on.
Review Ingredients: See what is out there. Who are the competitors?
–We take a look at what’s already out there. Who are your competitors? What’s effective and what isn’t? We assess where you are now and decide who you want to reach.
Start Main Course: Start the creative process to create a visual for the client.
–We kick off the creative process, look over things internally, and develop a design that connects your brand with your customers.
Sample While Creating: Discuss the ideas and concepts with clients.
–We meet with you to discuss the design ideas and make choices together. We value your input and improve the design based on your feedback. Usually, this involves two or three rounds of getting your thoughts.
Serve Finished Product: Final changes and finished product delivered.
–Our careful attention to detail makes the final result an excellent investment for your company, whether it’s for printing or digital use. So, if you need graphic design and a plan that helps you connect and communicate better with your customers — take a seat at our table!
Design Interface Inc. can show you what is possible. Our forward-thinking solutions for product design, package design, medical device design, graphic design and photography unlock the value of your ideas as we communicate your message and goals. See more here: https://designinterface.com/

Lessons Learned at Design Interface – A Farewell from Jacob Sarver-Verhey
Hello, my name is Jacob, and I’m all about product design. For the past year, I’ve worked with Design Interface Inc. as an Industrial Designer to design products, meet customer needs, and innovate bold new ideas in a variety of fields. It’s been a wonderful experience, and as I now set off for Indonesia as part of the Peace Corps for the next stage of my life, I have come to reflect on everything I’ve learned at the studio.
Of the many skills I’ve gained, the most important to the success of our work at DI has absolutely been collaboration. DI is a tight-knit team of professionals who know how to get things done and learning how to not just become a part of the process but to insert my own ideas has been a challenging but very rewarding experience. When I first was given the design lead on a project and saw my initial ideas change and evolve over the course of months into a fully manufactured product to be bought by consumers the world over it was a deeply humbling experience to see how far my concepts could travel. Even when the work became a grind at times, knowing that each day would bring new experiences and ideas kept me motivated and engaged with improving my design skills, and working with others to bring each project to a close.
Design Interface, like many design studios, is a place that is always evolving and moving forwards with new ideas and new technologies. In my time here I have seen 3D printing move from filament forms meant to illustrate to resin creations that can be used as functional prototypes. With the movement of manufacturing capabilities into the studio, the roles and expectations of designers have changed as well, and I have had a ton of fun learning the ropes with my fellow designers and creating incredible products in-house that would have required months of manufacturing and shipping from overseas in the yesteryears. Perhaps even more exciting has been the advent of AI technologies in the design process at DI over just the time I’ve worked at the studio. I recall playing around with primitive image AIs in my first few months of working and to see the technology grow and evolve with such rapidity that it is now a common tool in the workflows at the studio is astounding. I’ll be away in Indonesia for my service for over 2 years, and I cannot imagine what incredible technologies and techniques will be the norm by the time I return to the States.
It’s truly an exciting time to be a product designer, and Design Interface Inc. has been for me an incredible step forward in both my career as a designer and in my personal journey of growth as an individual. When I stepped through these doors a year ago, I was nervous about all the challenges that having coworkers, increasing the scale of my designs, and having the expectations of a legacy of design work would bring. Today, as my time at Design Interface comes to a close, I am more excited about the future than ever before.
Design Interface Inc. can show you what is possible. Our forward-thinking solutions for product design, package design, medical device design, graphic design and photography unlock the value of your ideas as we communicate your message and goals. See more here: https://designinterface.com/

How to use Adobe Photoshop’s new Generative Fill AI tool
Adobe Photoshop’s new integrated AI tool is here, powered by Adobe’s Firefly AI algorithm. You can access it today by downloading Adobe Photoshop Beta and get right to creating within a few minutes. The tool is simply integrated into the Photoshop workflow, with just a few things that a creator needs to know before they can get started:
- To begin, make a selection anywhere on the canvas, be it a blank page or an existing image.
- The generative fill option will be available by default, or in the right-click menu.
- Click generative fill and type a short prompt of what you want to create.
- The tool will use the selected area and surrounding canvas as context to better blend the result with your image.
- Keeping your prompt between 3-8 words will help maximize cohesion.
- If you don’t like your result or want to see more options, just click generate again, and perhaps change your text prompt.
- The generated area will be saved as a separate layer from your base image, allowing for editing of the two separate or combined, and the blending of multiple generations.
- Just like adding something new to a canvas, you can also use generative fill to remove something. Simply select an area with the subject you wish to remove and perform a generative fill with no prompt, and it will be filled in based on the surrounding image.
- To generative fill a background, inverse your selection and then perform the generative fill as normal.
- To outpaint a canvas, use the crop tool to expand the canvas size, then perform a generative fill in the blank area to see your image expand!
- You can type in a prompt or not when outpainting. If no prompt is entered, the generative fill will extend the content of your original canvas.
Design Interface Inc. can show you what is possible. Our forward-thinking solutions for product design, package design, medical device design, graphic design and photography unlock the value of your ideas as we communicate your message and goals. See more here: https://designinterface.com/
